Lessons from the Roof of Africa – Mt Kilimanjaro
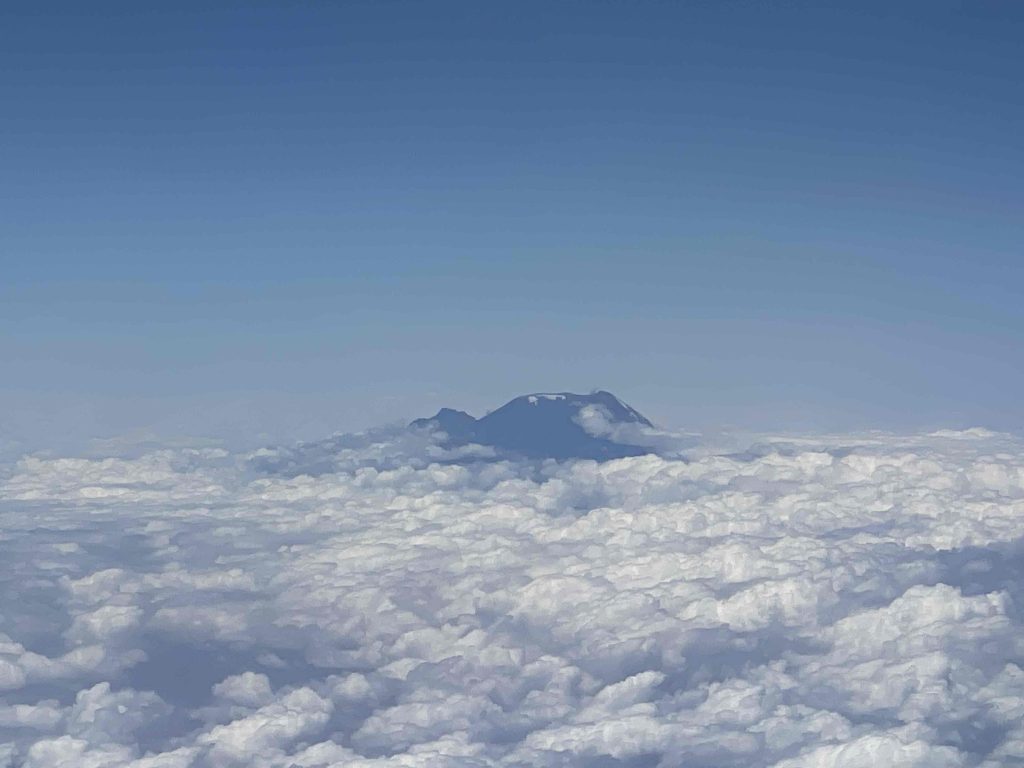
Mt Kilimanjaro—affectionately known as Kili—is the world’s tallest free-standing mountain, rising proudly from the Tanzanian plains. Tanzania itself is a stunning country with a tapestry of history and culture that’s well worth exploring. Kili tops out at a cool 5,895 metres above sea level, making it the highest peak I’ve ever attempted—so yes, some preparation (and maybe a little bravery) was definitely required.
This blog is my attempt to walk you through my journey of climbing and ultimately summiting Kili. But fair warning: no collection of words can truly capture what this mountain demands of you mentally, physically, and emotionally. Still, consider this your backstage pass to a beautiful, brutal, unforgettable adventure.
How it all began?
A couple of years back—2018, if my memory isn’t playing tricks—my friend and I decided it was time to get back out there and climb a serious mountain. And by “serious,” I mean the kind of mountain that makes you question all your life choices halfway up, yet somehow gives you just enough motivation to keep going. I hadn’t done a proper multi-day hike since 2011. I was living in Australia at the time, happily cruising through life, when a random catch-up call filled with the usual banter suddenly turned into: “Let’s climb something.” And somehow, Mt Kilimanjaro made it onto the list.
To be honest, I knew nothing about Kili at that point. I had to sit down and Google like a teenager researching a last-minute school project. It looked… manageable? And the internet was full of people of all ages climbing it, so how hard could it be? (Spoiler: harder than Google suggests.)
Then life happened—and by life, I mean the pandemic. Early 2020 pressed pause on our plans. But during that downtime, I talked about this dream so much that I basically manifested it into existence. And hey, it worked. We declared 2023 the year we’d finally take on Kili.
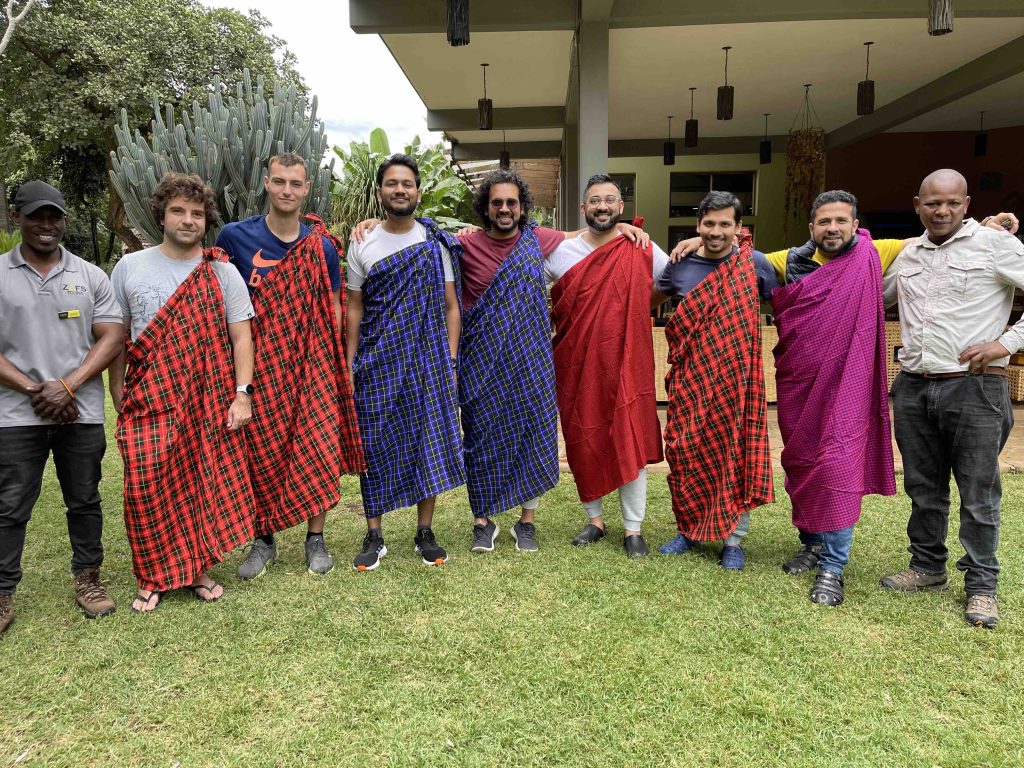
We rallied the troops, reached out to anyone remotely interested, created a group chat, and even built a spreadsheet (I know… I’m that kind of planner). Our team became a global mix: the Aussies had the longest journey to get there, while the Germany and Croatia crew practically strolled over.
Choosing the right people to spend six days with—in freezing nights, thin air, questionable smells, and emotional highs and lows—is crucial. You need like-minded adventurers who can lift you up when you’re struggling and celebrate with you when you’re unstoppable. And thankfully, we had just that.
Preparation, Preparation and Preparation
When the world finally crawled out of the Covid era in 2022, I suddenly had enough interested friends to kick-start the planning phase. And as some wise (and probably slightly chaotic) person once said: If you want to go somewhere… just book the damn tickets. So that’s exactly what we did. We locked in our dates and began hunting for tour companies—about six months out from our climb.
A crucial heads-up: you cannot summit Kilimanjaro without going through an authorised tour operator. Full stop. So, at some point, you’ll have to choose one. I went down the rabbit hole of Facebook groups and travel sites, only to find extreme reviews on both ends—either impossibly glowing or wildly dramatic over things I didn’t care about.
In the end, we went with ZAFS Tours, recommended by my cousin in Kenya—and honestly, best decision we could’ve made. They worked closely with us to build a solid itinerary on a tight timeline, and everything just clicked from there.
Training Day Hikes
A few of us who lived nearby started training together on weekends. The goal? Tackle the toughest trails we could find and get our backs, knees, calves, and thighs thoroughly acquainted with the concept of suffering. Week after week, the hikes got a little easier—mostly because our bodies finally accepted their fate. I even switched up my diet to add more protein.
Somewhere along the way, I discovered an issue with my Tibialus anterior (yes, I had to Google that too). Thankfully, my physio worked her magic—two sessions and the problem was basically gone, which made a massive difference in my performance. For context, I weighed about 92 kg at the time, which is… not exactly feather-light when you’re planning to walk an average of eight hours a day. So getting my legs in shape wasn’t optional—it was survival.
What we didn’t train for was doing this day after day for nearly a week. A day hike is easy: you sweat, you struggle, you go home to a hot shower and a cozy bed. On Kili? You finish your hike and crawl into a tent to sleep on the ground. Then you repeat that—six days straight. It’s a whole different game.
Choosing your Route
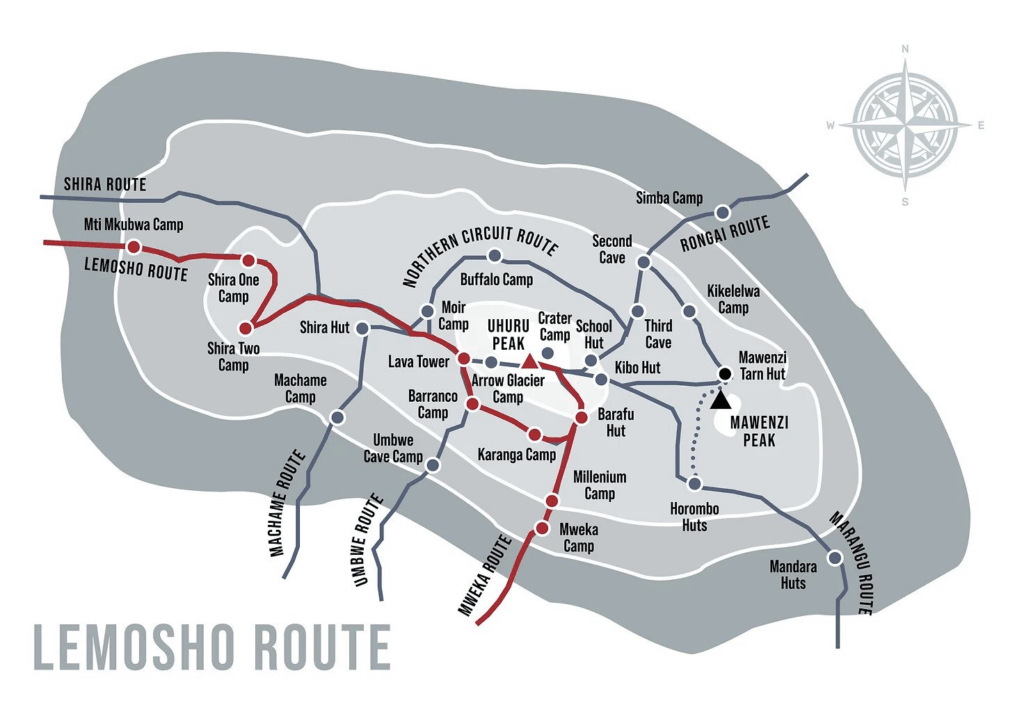
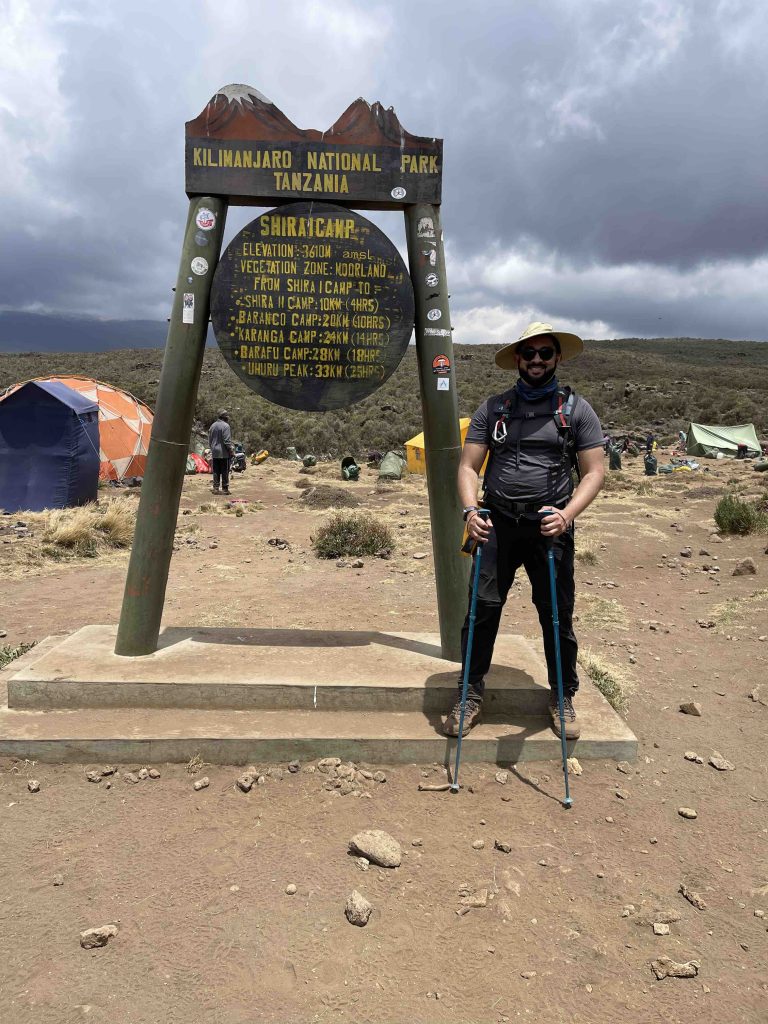
We chose the Lemosho route, famous for being both stunning and kind to your lungs. It’s widely considered one of the best ways up Kili, especially for acclimatisation. We looked at other routes, but most were either too fast (great if you want angry knees and altitude sickness) or way too long. Lemosho hits the sweet spot—about 70 km with a solid High difficulty rating—and starts on the western side of the mountain, giving you a nice, gradual ascent.
On the opposite end of the spectrum is the Shira route, a.k.a. the “please-don’t-do-this-to-yourself” option. You literally get driven up to a high altitude and then start hiking from there—terrible for acclimatisation and generally not recommended unless you enjoy suffering unnecessarily.
For beginners, the Marangu route (shorter duration) or the Rongai route (a bit longer but gentler) are usually the safer, easier bets.
AMS is your enemy
Let me tell you—AMS (Acute Mountain Sickness) is very real, and every one of us felt it in some form. Thankfully, we planned our Diamox (Acetazolamide) dosage ahead of time, which helped keep things under control. There’s always debate about whether you “really need” Diamox, but honestly… better safe than sorry when your brain and lungs are involved.
We even saw a few climbers being airlifted out of Barafu Camp—around 4,700 metres—because their AMS symptoms escalated. The golden rule at altitude is simple: don’t ascend more than about 1,000 metres in a day. And always follow the “climb high, sleep low” principle. That means you hike up to a higher altitude, then descend slightly to sleep. Once you reach camp, it’s a good idea to take a short walk or mini-hike to help your body acclimatise. It’s not fun, but it works.
More on my climb experience down below.
Sourcing your Equipment
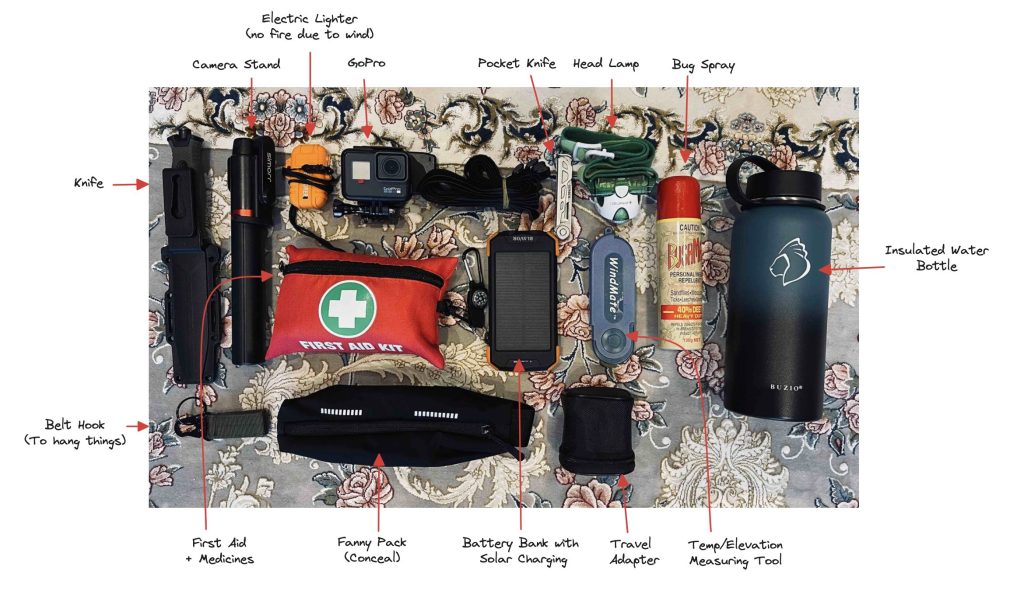
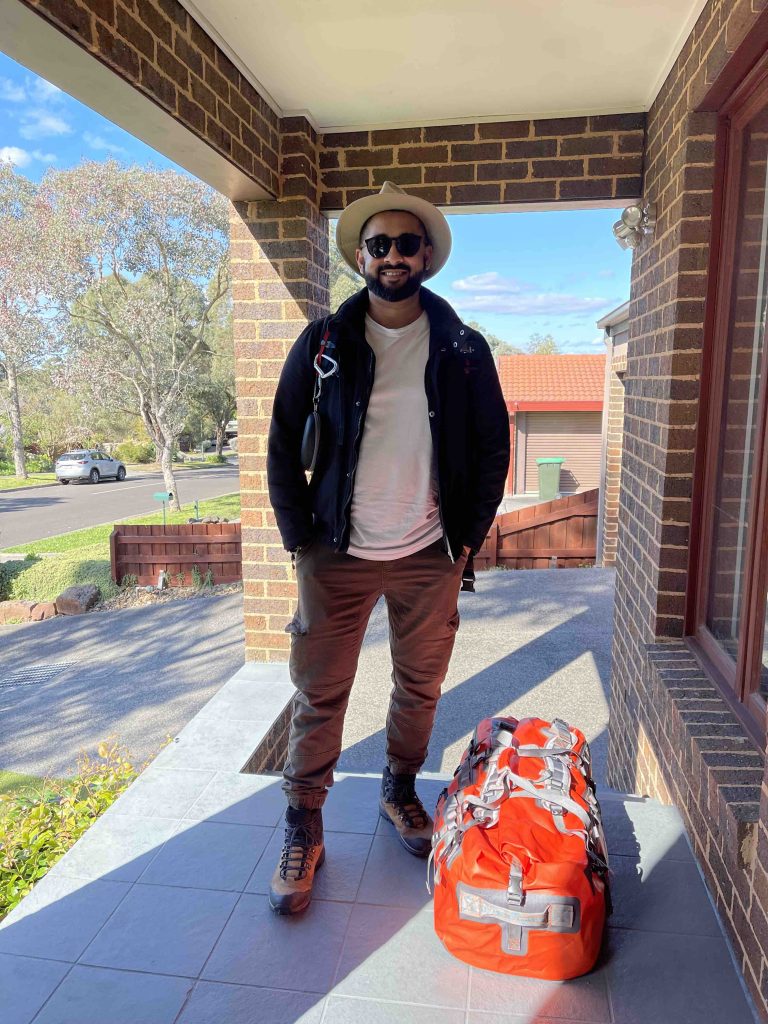
Another major part of preparation was getting our gear right. We had to figure out what was essential, what was a luxury, what was mandatory, what was truly optional, and what we were just overthinking because… well, hikers love to overthink. All of this while keeping our bags under the 15 kg limit. Fun times.
I started collecting my equipment at least six months in advance. The most critical item? Shoes. If you get your boots wrong on a multi-day climb, you’re basically signing up for misery. Luckily, our training months lined up perfectly with winter in Australia, so we got a taste of the cold we’d face on Kili.
I sourced gear from everywhere—Amazon, AliExpress, retail stores, online shops… you name it. (I’ll include a full list at the end of this blog: the brands I used, what worked brilliantly, and what absolutely didn’t.)
Below is a snapshot of the things I carried. Things not covered in the images are:
- Hiking Shoes
- Hiking Poles
- 35L Hiking day pack
- 3L water bladder
- Instant heating gel

Travel Insurance
Travel insurance is non-negotiable. During my research, I discovered that only a handful of companies actually cover hikers going up to 6,000 metres. I eventually chose World Nomads, which cost me around $290 AUD. We had one hiker in our group who decided to skip insurance—thankfully, nothing happened, but it still made me nervous.
As I mentioned earlier, we did see a couple get airlifted from the mountain, and having insurance made that whole process far easier for them. Without it, you’re looking at a bill of around $5,000 USD just for the helicopter evacuation—never mind potential hospital costs. We also saw a woman being wheeled down the mountain on a handcart due to severe AMS, just so she could reach a point where evacuation was possible.
Long story short: get your travel insurance. No matter what.
In and Out
It’s best to arrive in Kilimanjaro at least 24 hours before your climb. In that part of the world, flight delays and cancellations happen more often than you’d like—though we somehow dodged that bullet. What’s even more common? Lost or stolen luggage. So here’s a golden rule: always pack your hiking boots and key jackets in your carry-on. The last thing you want is to buy new boots at the airport and break them in by walking eight hours a day. Trust me, that’s a recipe for blisters and regret.
You should also give yourself 24–48 hours after the climb before jumping into your next adventure. We made the rookie mistake of booking a safari the very next day. As excited as we were, our legs and feet had officially clocked out. A little extra downtime would’ve felt heavenly.
Getting into Tanzania
We touched down at Kilimanjaro Airport two days before our climb, giving us just enough time to unwind and shake off the travel fatigue. As the closest airport to Kili, it’s small but functional. You can either apply for an e-visa in advance or get one on arrival. We thought the e-visa would save us time, but it turns out everyone had the same idea—so the folks getting visas on arrival actually got through faster.
We stayed at Weru Weru River Lodge near Moshi town, about an hour’s drive from the airport—a peaceful spot to rest before the adventure began.
Start Your Engines
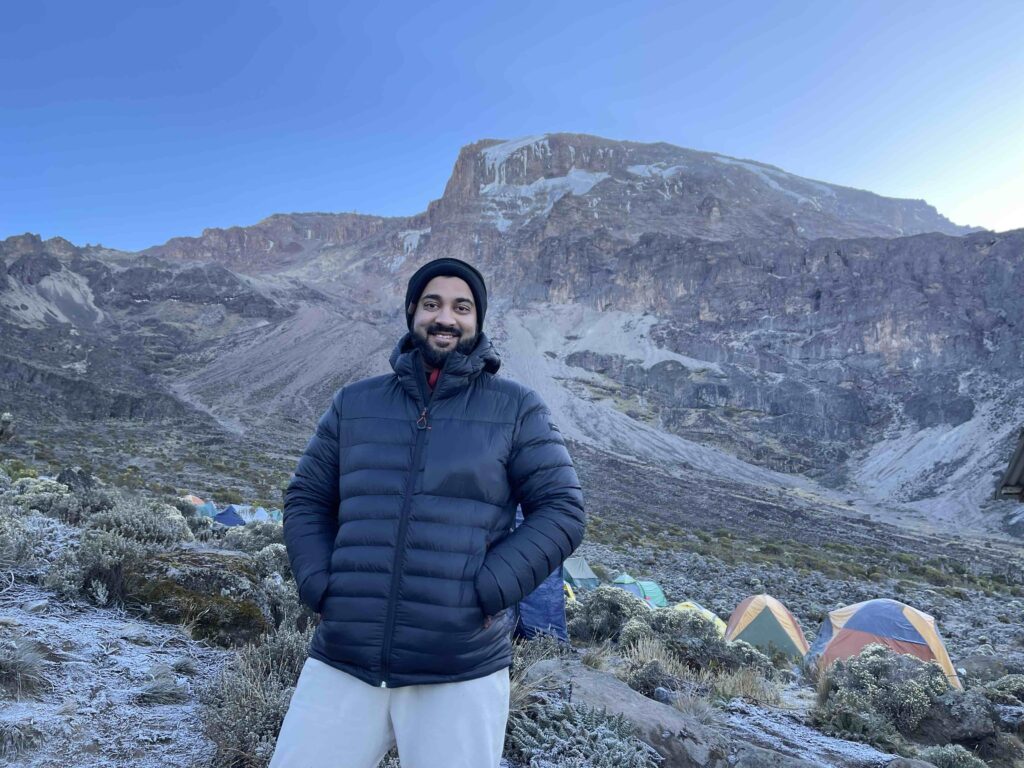
Day One: Lemosho route start to Mti Mkubwa Camp
We started early in the morning at about 7am. Packed our bags and got ready. Our guide/captain Sam inspected our bags weighing them to ensure we’re not overpacking whilst also ensuring our gear is the right one. They usually look for down jackets, shoes, inner fleece jackets, woolen caps, sunnies (UV protected), headlamps, walking sticks etc (most of which I’ve already covered on top).

After we have had a fulfilling breakfast we get into a huddle/team meeting where expectations are set, we’re pumped up with inspiring talks and off we go. We hopped into a big bus and off to the Town where we have a short stop over to purchase any missing equipment. We reached the starting point of the National Park (Londorossi gate) by around 2pm and had to register ourselves and get served hot meals.
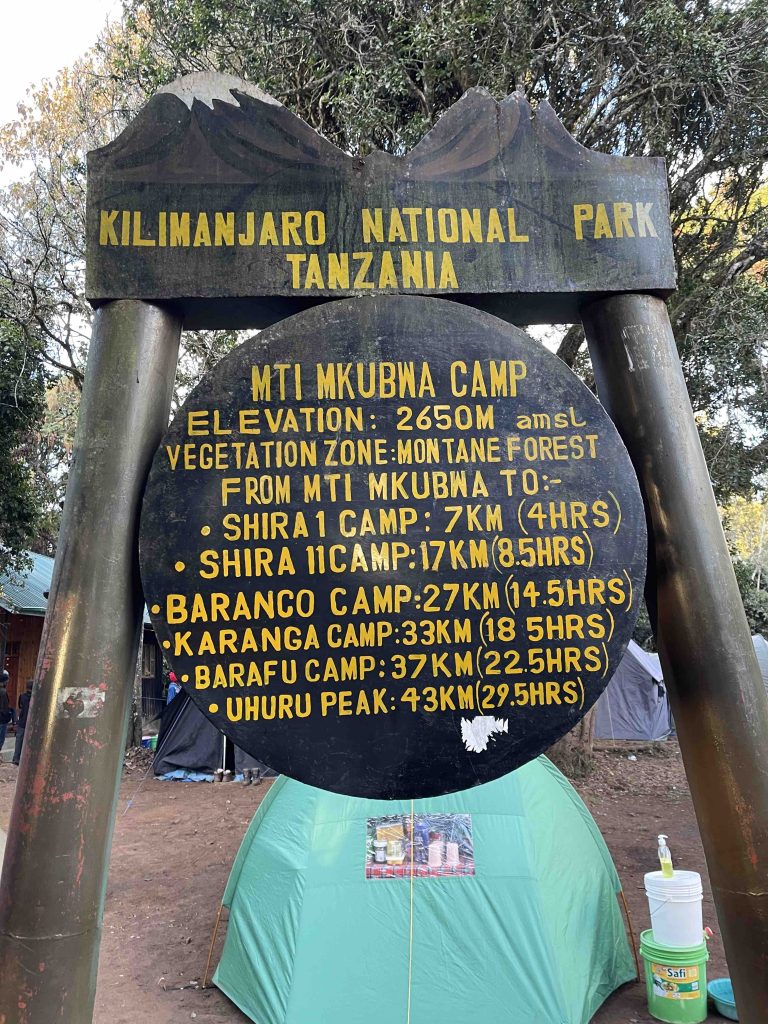
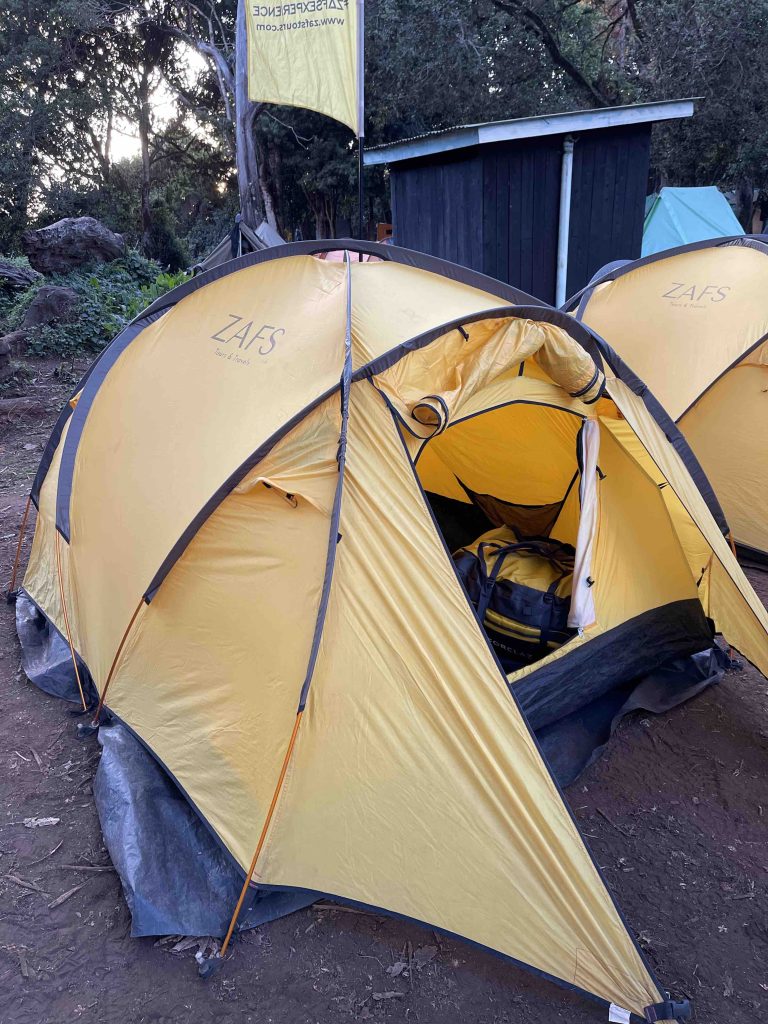
They are very strict about registration at every checkpoint to ensure people enter and exit and do not get lost. Once we had been fed well, we started walking to our first stop for the day – Mti Mkubwa camp where we rested for the night. It was a cozy little tent and because I’m a loud snoring human, I was given my own tent for the entire trip (couldn’t have been happier about this – got so much space and privacy to myself).
It was still warm while the sun was up but as the sun went down, it started to get a little chilly. I believe the temperature would have been around 17 degrees celsius.
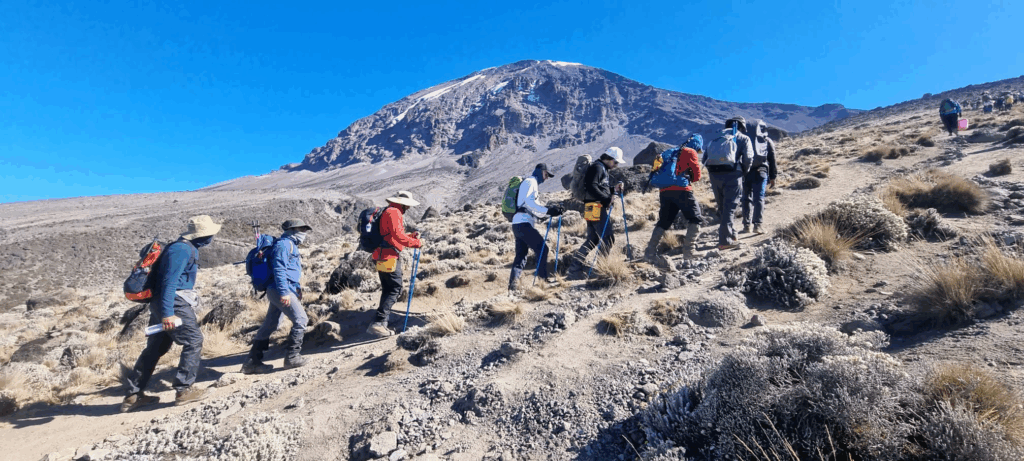
Day Two: Off to Shira 2 Camp
The first night at any place is filled with anxiety and rough sleep. While last evenings walk was just 2-3 hours, I had already started to feel the effects of the elevation. I was struggling to keep up with the group which became a trend for the rest of the hike however I have to commend my guide Sam who kept me motivated and slowed down for me to ensure I will make it to the top. He always said that you will make it to the top – and I did!
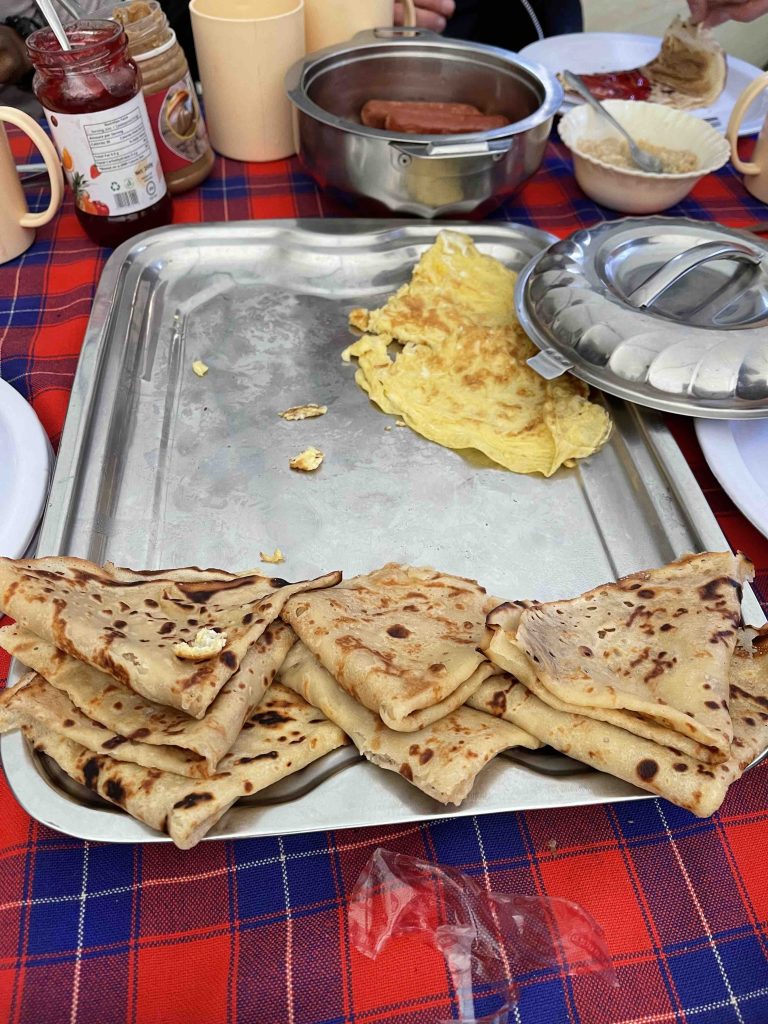
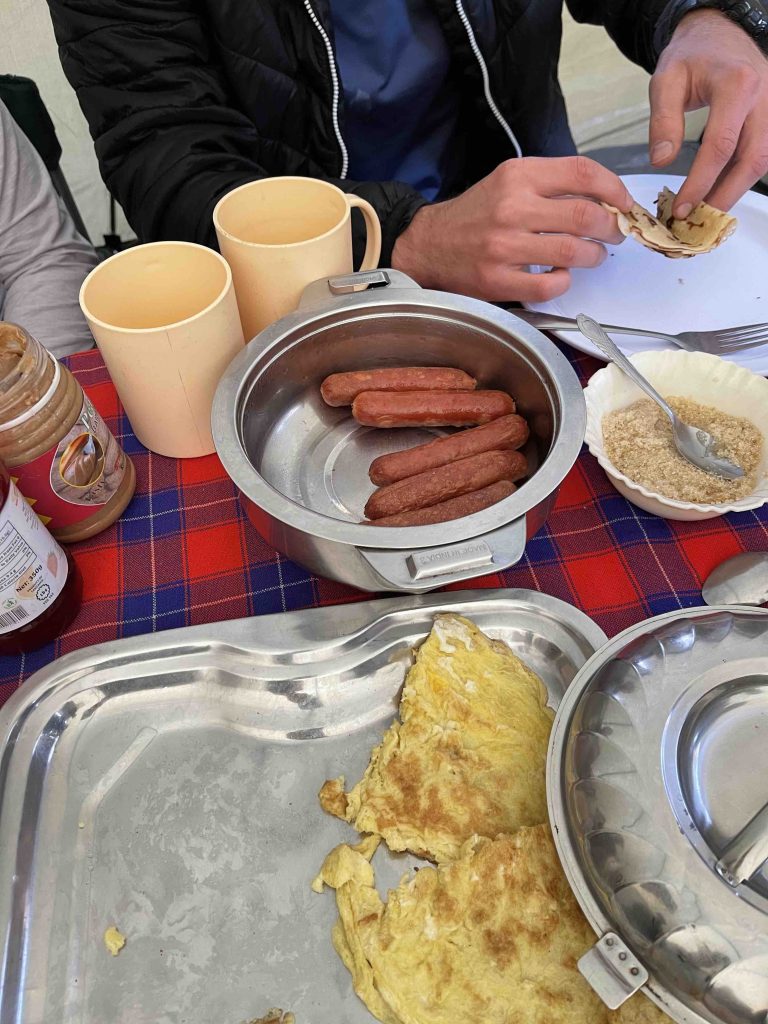
Our day started at about 7:30am. We were greeted with a spectacular view of the Kibo Peak. Got ready and were served excellent breakfast and coffee. Our trekking company was very good at providing us with the food that would help us keep the energy for the full duration. We were having eggs, sausages, bread, salads, and some good coffee.
Then we started walking towards Shira 1 where we made a quick pitstop for lunch before we pushed towards Shira 2 and camped for the night. While this walk was relatively simpler, and we did cover a lot of flat terrain and started to feel the high altitude and reduced oxygen. The dust and dry weather wasn’t helping much. Thankfully it wasn’t that windy.
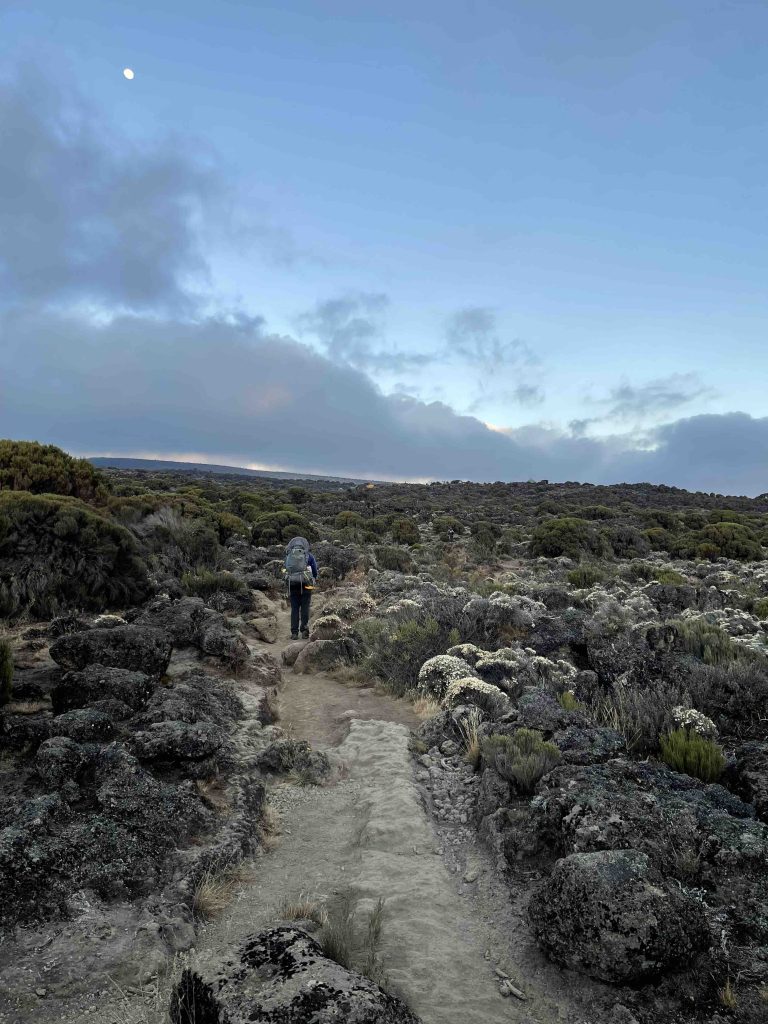
As you can see below, we had started to see some really interesting vegetation. We were moving from Green tropical areas into more of a Dry Desert section of the mountain. We were seeing trees adapting to a water scarce environment and still thriving.

We eventually made it to Shira Cave camp which took approx 6 hours with an elevation gain of 850 meters. The temperature did start to drop. That night, the stars blanketed the sky and the Milky way shone with an intensity I’d never seen before. CLEAR SKY!!!

Day Three: Head to Barranco camp via Lava Tower
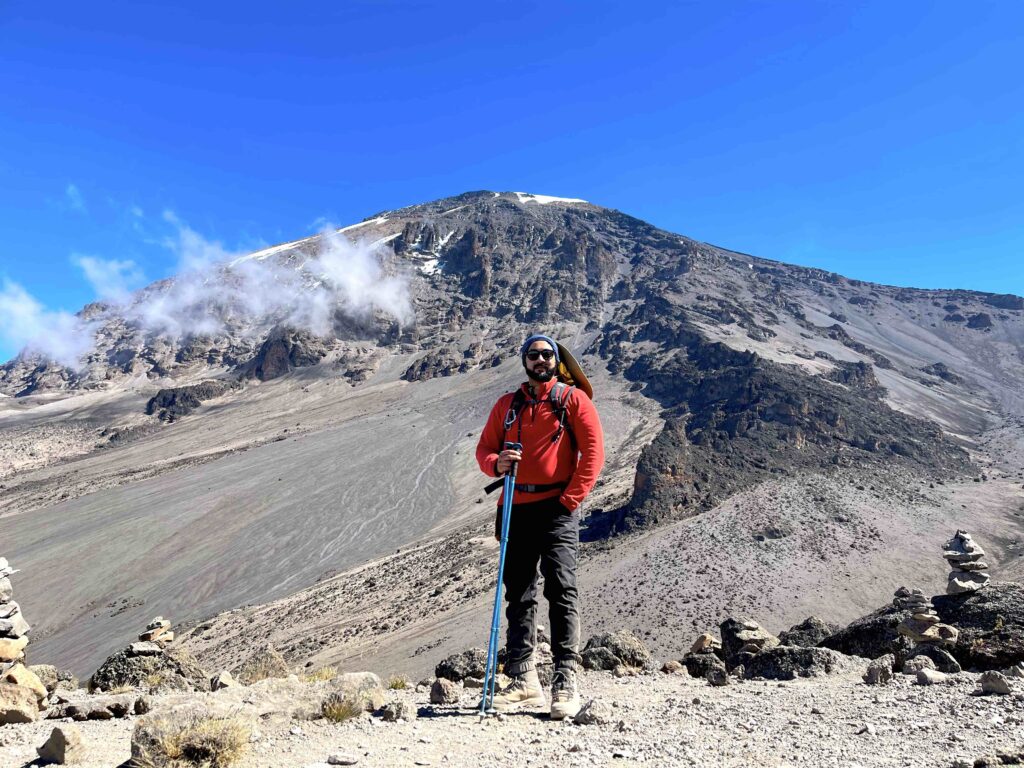
Day 3 is a pivotal acclimatisation day. We were up by 7am and packed ready to go. Our guides had told us that this one was also going to be a relatively easy one however to get prepped for lower temperatures. I had already started with my third layer. We started walking as per schedule after our morning ritual that included a heavy breakfast and caffeine shots.
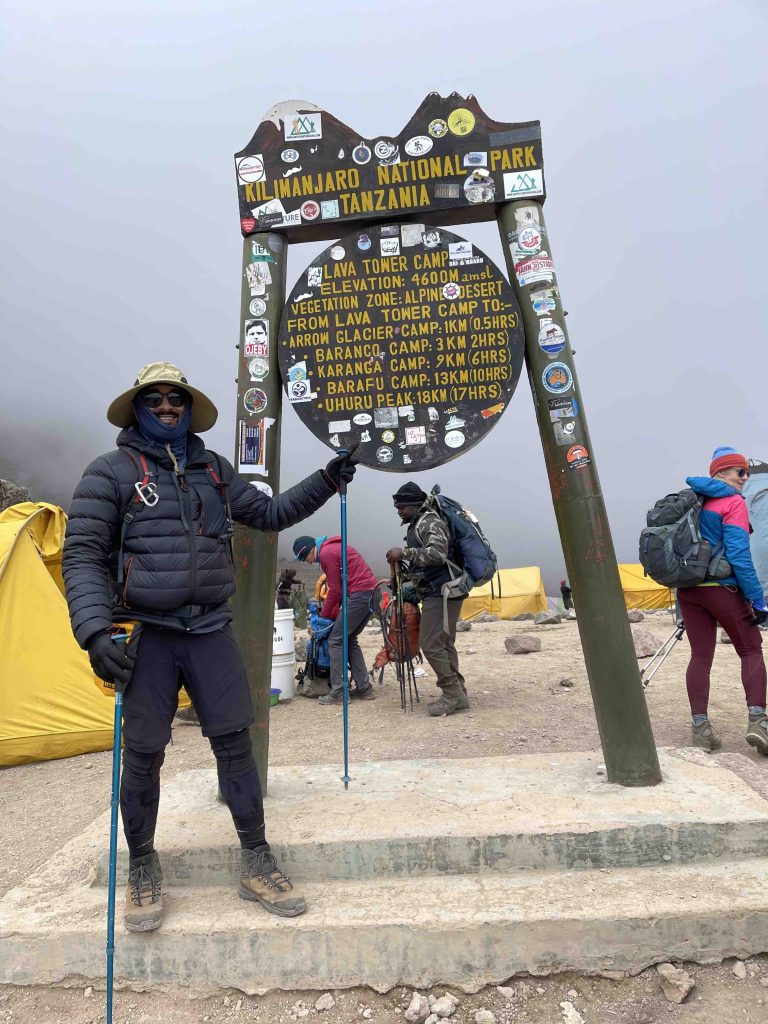
Here we hiked up to Lava tower which is at 4630m – while the distance is short, but the elevation did its job. I started to see both my lungs and legs struggling at this point. Our guides constantly encouraged us to eat, hydrate and walk slowly – “Pole Pole” (pronounced as POLAY POLAY) – meaning “Slowly Slowly”.
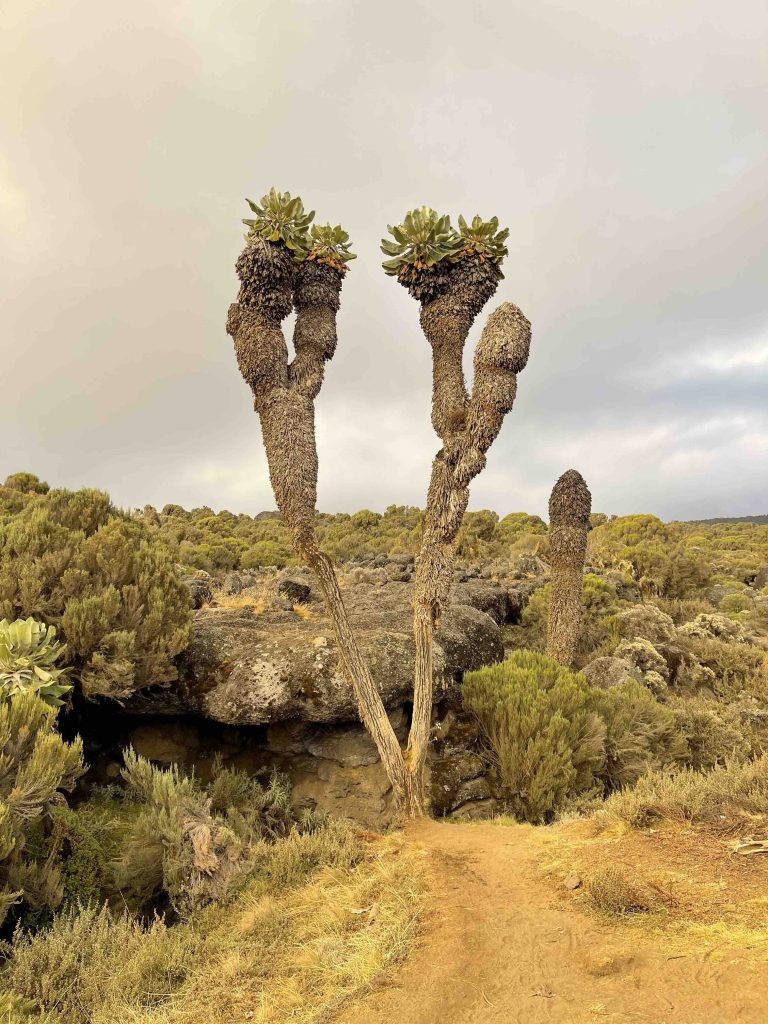
We stopped for lunch at Lava Tower and descended to Barranco Camp (3975m). This slight drop was helpful for those of us who struggled with the breathing. For any mountaineer the usual is climb high, sleep low which is what helps with avoiding AMS. We continued to see the beautiful Senecio trees (which are not found anywhere else except in Socotra – a Yemini island)
Day Four: Barranco camp to Karanga Camp
Fatigue has started to kick in. The lack of oxygen is starting to get to us. Exhaustion is real. The weather has gotten colder than earlier. And we are sleep deprived already. Sounds fun right!!!
Well I dont even remember sleeping. I just remember lying down after dinner and opening my eyes at dawn. Get the the regular routine i.e brush, poop, clean, sanitise, pack, and get ready for breakfast. At this moment we started to see the humungous Barranco wall in front of us.
When our guide told us we were going to climb this wall of a mountain, we were like yeah he is definitely joking. But then I remembered a few videos of the Barranco wall. And while randomly taking a video, I zoomed in to see some climbers were already at this. There were a tiny dot on that mountain. I instantly felt this feeling of excitement and fear at the same time. But then this is what we were here for.
The Barranco wall is famous for its traffic jams. Most trekking group race to get on top of it as soon as they have packed. Plus the porters also need to use the same route and race all the climbers to reach the next destination to setup and prepare for us. I truly salute the grit and strength of these porters.
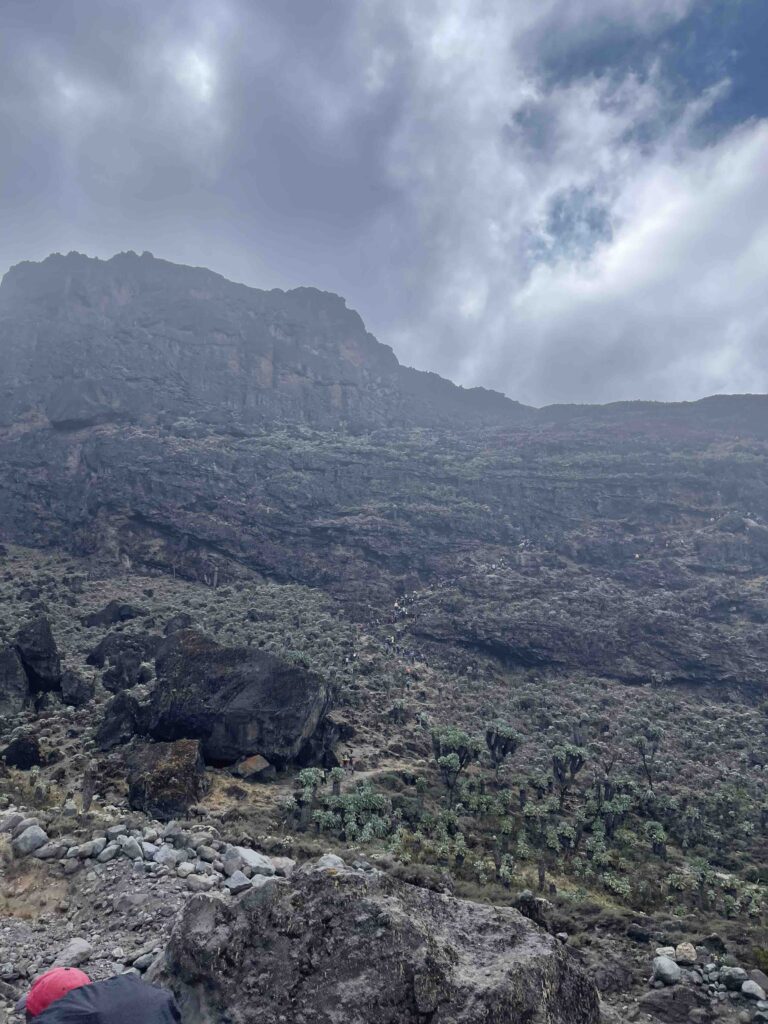

As you can see we are standing in a line trying to balance our already tired bodies on this mountain along with our backpacks while the porters singing and listening to some pop afro music on their battery charged speakers with about 30 kgs on their head climbing this like its their backyard – well it is.
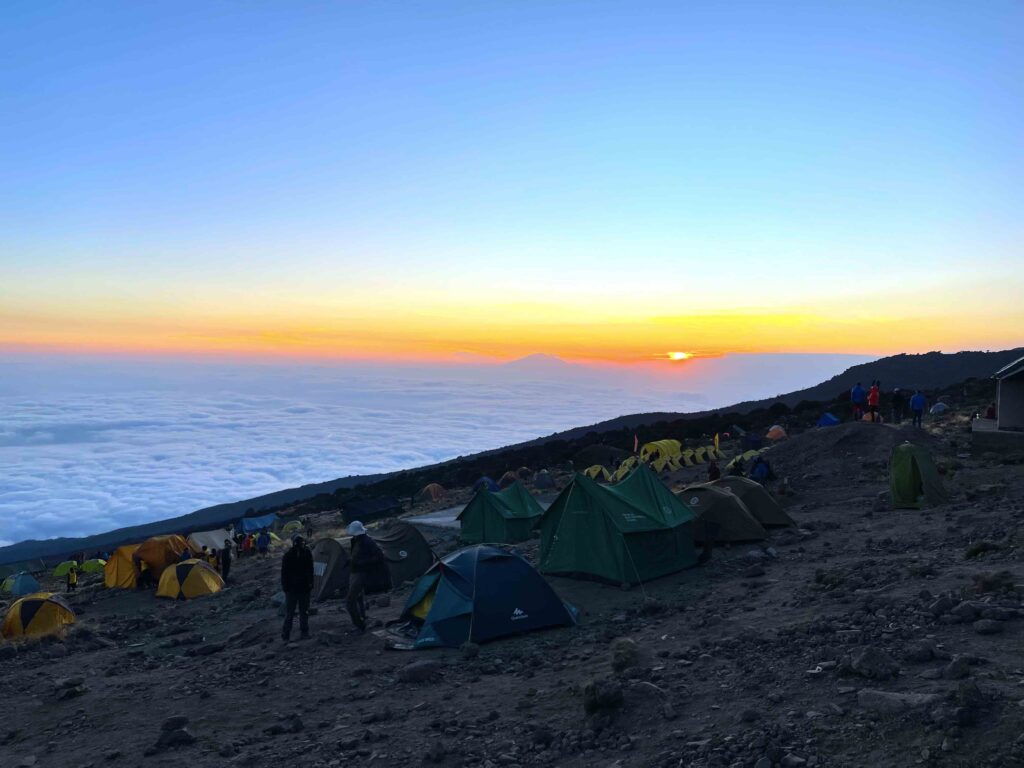
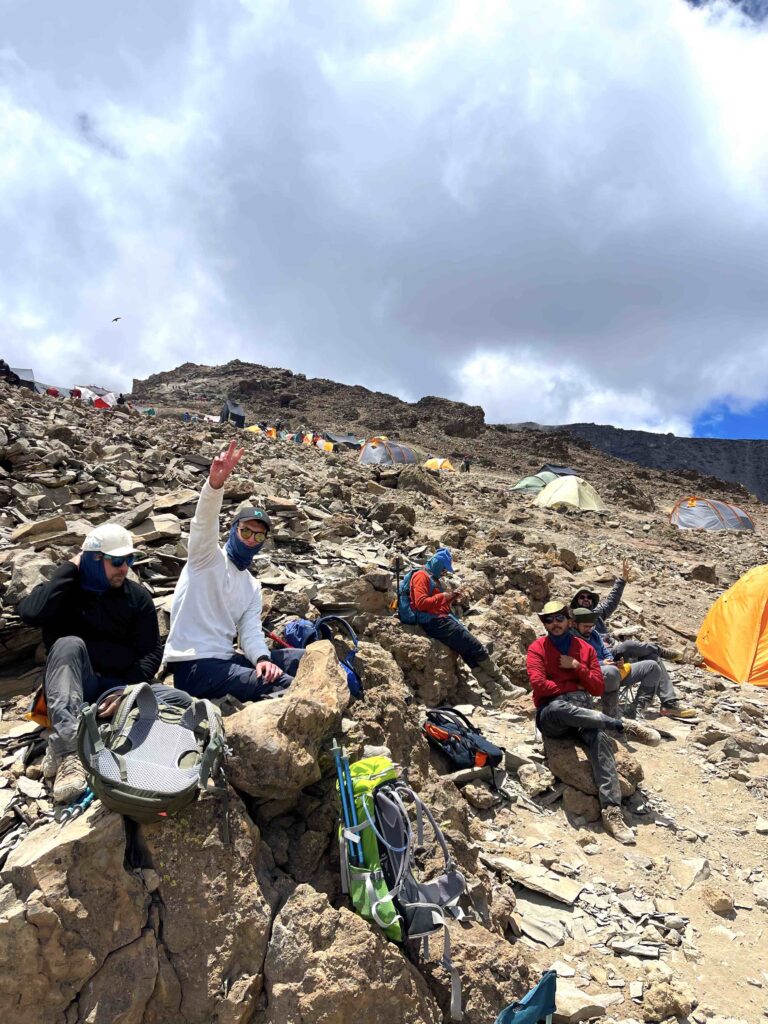
It took us about 4-5 hours of climbing to reach the Karanga Camp. The views here were spectacular. We were already above the clouds and the wind was chilly. We camped here with this sunset view and our exhausted bodies.
Day Five: Up to Barafu Camp
Rise and shine – we are now super close to our objective. We have our destination in sight.
After our usual routine we set out. At this point I think most of us were quite exhausted and wanted this to end so most of us were rushing up the mountain. We were a group of different fitness levels and so we would usually split apart while ascending. This is usual and this is where a good trek company and good trek guides come handy. Our trek guides were able to assess everyones individual capabilities and were able to pace everyone out differently without impacting anyone.
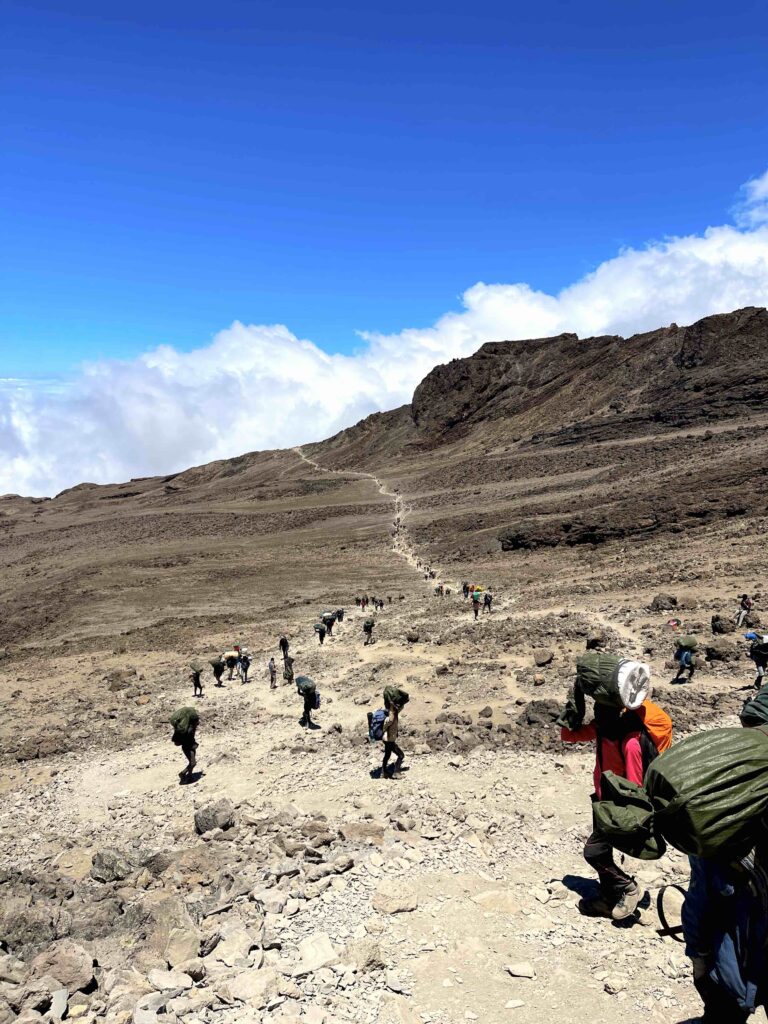
The road looks endless at this elevation. It gives you an understanding of just how big this mountain is. We arrived midday with a walking of about 4-5 hours. This was the busiest camp site we had seen. Most of the other climbers from other routes land here. This is a common intersection before the big summit climb.
On this day we ascend to 4600m and it took us about 5 hours in total.
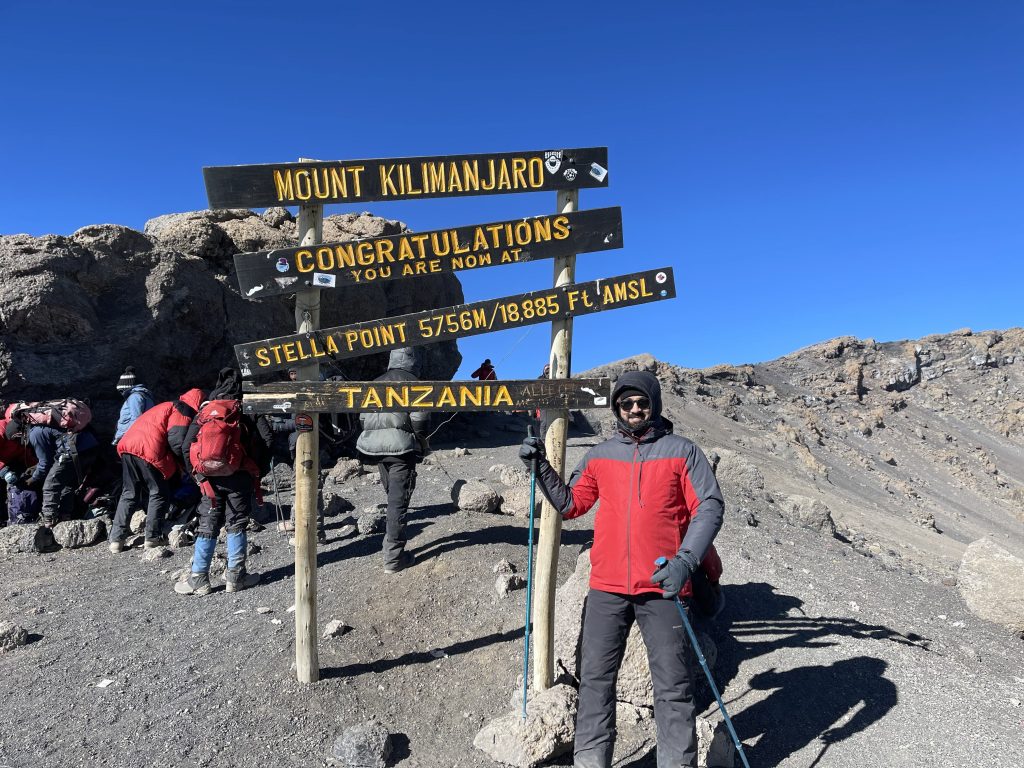
Day Six (Summit): Summit to Uhuru Peak and descent to Mweka Camp
This is the day you have come here for – the Summit night. It is what you have prepared for – mentally and physically. Before we go into Day 6, we need to continue what happens on Day 5 after you have arrived at the camp and how that impacts you in your Summit night.
Imagine this – so its still Day 5 and we are heavily exhausted after reaching Barafu camp after walking for over 5 days. The Lemosho 6 day route is an aggressive yet scenic route well suited for acclimatisation. Its about 12:30pm in the noon. And we are told to cleanup and report for a quick health test which will determine eligibility to climb. Our oxygen needs to be above 70%. We have our lunch and get tested. A few of us aren’t really making the cut!!! Yes this is a reality. You could come so close to the peak and yet be told to go back. And you might look perfectly normal however you always listen to the guide.
Well we were told to wait and settle down. In this chaos I tried to take a nap but in my attempt to climb this peak, my anxiety was also at its peak (sorry 😀 ). I barely got some shut eye and it was an early dinner at about 7pm along with another round of tests. Everyone passed and were were ON!
We were instructed to rest. But all the climbers from other groups who were not summiting that night were busy singing and shouting. You definitely cannot sleep in this.
At about 10:30pm we get up and get ready. Its time! We grab a small bit as every bit of energy counts. Fill up our bottles, check our headlamp batteries, our gear and jackets. At 11:30pm we are off!
This has been the longest night I have every had. Your body is already exhausted and your muscles and joints are aching. You are sleep deprived. It is cold. After 3 hours (2:30am) of continuous walking – my legs start to give in and sleep deprivation is killing me. I’m literally falling asleep while walking. I begged my guide to allow me a quick pause. I just needed 5 mins of shut eye. I still remember him saying – you stop, you go down.
At about 3:30am I’m already hallucinating. I remember asking him in continuous repetition of how much more time and he kept saying we are almost there. But due to the pitch darkness and shining headlamps you are literally just following the stream of lights. I have no clue how the guide do this.
At 4:30am I need a break. I was looking for an opportunity to stop. I couldn’t see the rest of my group as they’d overtaken me since midnight. I noticed another group take a pause and I disobeyed my guide and sat down on a rock. He gave me a can of pepsi and said the soda and sugar will wake you up. It did! The time from here until 6:30am when I reached the top was the toughest. I literally have fought a mental battle. My head kept saying “its okay to quit”, “you’ve made it this far”, “how shameful will this be though”, “I dont think I’ll make it”, “i should have prepared more”, “i can maybe try this again in the future”… etc. I started to think about the almighty and prayed to him. I asked for some courage and strength and will to get through this.
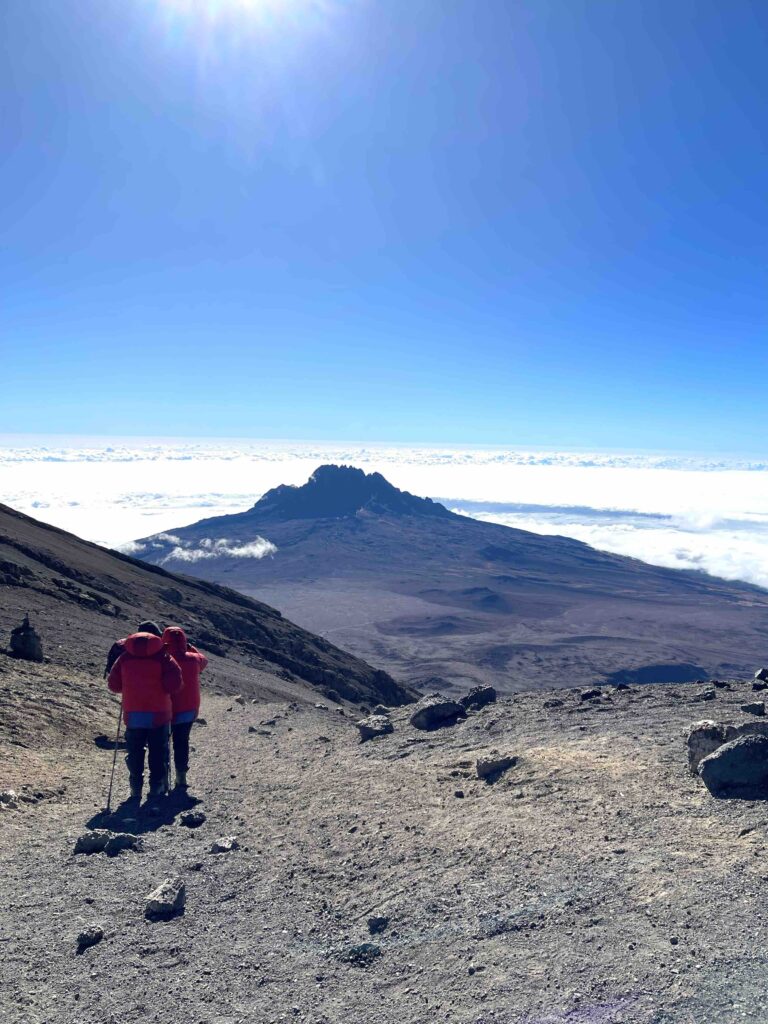

The view from 5895m is out of the world. It is something you cannot fathom. However now comes another challenge – getting down. While we took 6 days to get to the top, we only get 1 day to get down. And we barely are allowed not more than an hour on the top due to lack of oxygen.
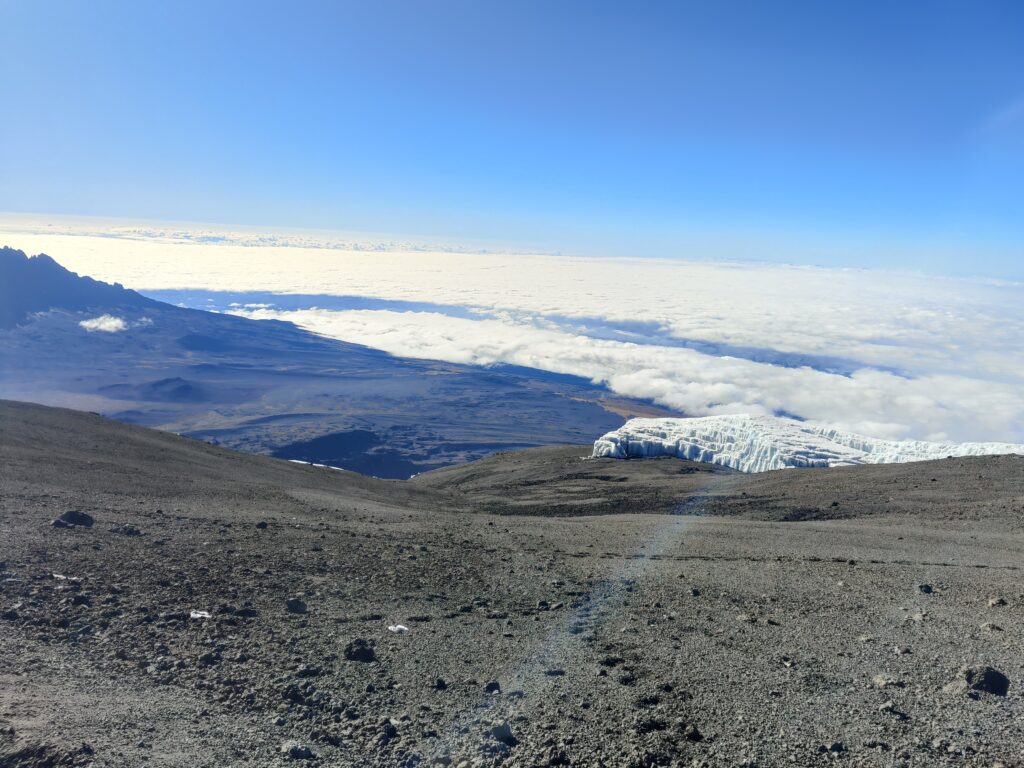
As mentioned earlier – I was the slowest of them all and when I reached on the top, I saw these guys already start to walk down. What I lacked in ascending I possessed in descending. I literally ran down the mountain. I started to walk down at 8am and I was at Barafu camp by lunch time at the same time the rest of the group reached. We had our lunch together, celebrated and were instructed to start descending to Mweka Hut for the night.
By 5pm we were at Mweka Hut at an elevation of 3000m and warm weather. It was time to dislocate my legs and auction them off. I could barely feel them.
Day Seven: Mweka Hut to Mweka Gate
The last day when you get to go back to your hotel and civilisation and see a hot shower and bed. We couldn’t wait for this.
An early start after a good breakfast. This is the longest descend and the road sucks man. The amount of rocks impacted how fast one could walk down. Here is where our walking poles came handy. Walking poles helped you to ensure even if you slip you will have good balance. The other important thing needed here is good ankle protected shoes. You dont want to twist it and have to be carried down in any form. On our way we did see a lot of people having to be taken down due to some medical reason however due to the landscape were unable to be airlifted and hence were literally in a cartwheel being taken down the bumpy road. I cannot even fathom the state of the individuals back by the time they reached where they were going.

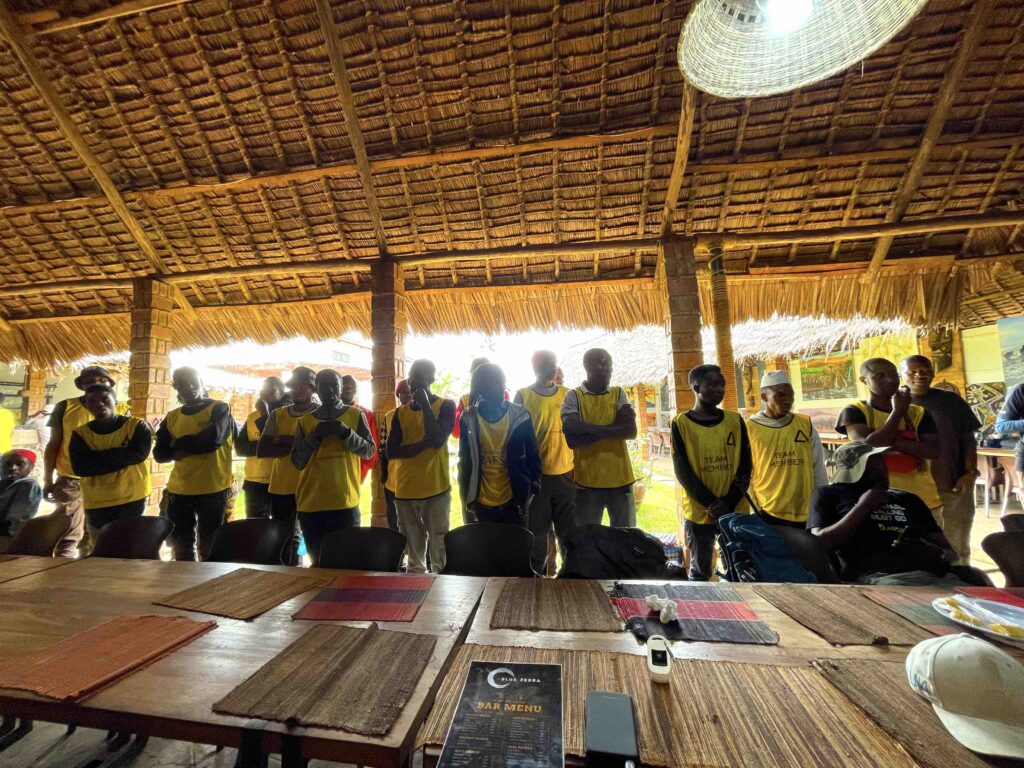
Couldn’t have done it without these superheros from ZAFS: